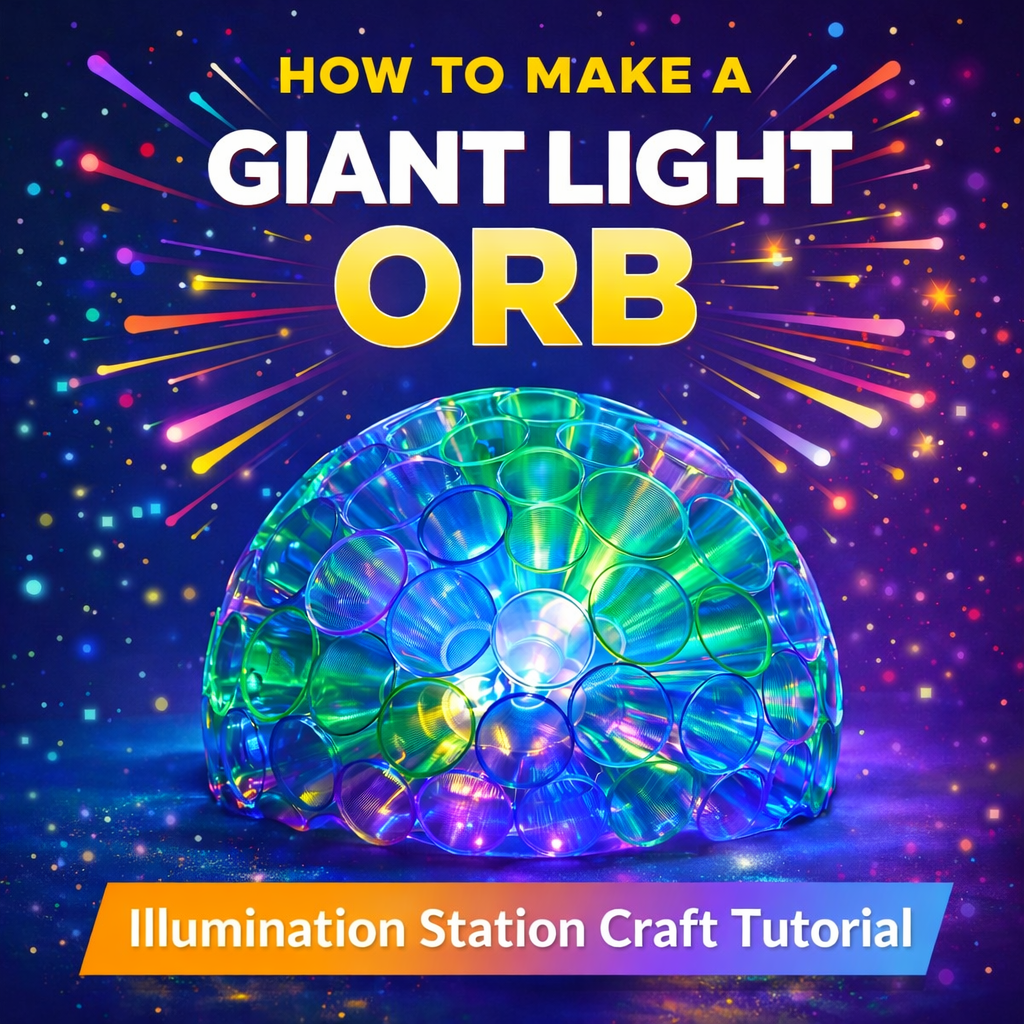
This project creates a large, glowing light orb using plastic cups and LED lighting. The finished orb is lightweight, durable, and visually impressive, making it ideal for stages, learning stations, or themed environments. These instructions are written for a
- Slightly offset rows
- Multiple glue contact points
- Letting the glue set before rushing ahead
If you go slowly and follow the sequence, the orb will hold its shape without internal supports.
Time, Skill, and Team
Plan for about 60–90 minutes of build time.
This is a beginner-friendly project, but hot glue requires adult supervision. Two to three people works best:
- One person gluing
- One person holding and clipping
- One person staging cups and checking alignment
Supplies You Will Need
You will need approximately 100 plastic cups, all the same size and brand. Sixteen-ounce cups work best. Tinted cups (blue, green, purple) produce a better glow and hide gaps more effectively than clear cups.
You will also need:
- A hot glue gun (high-temperature preferred)
- Plenty of glue sticks
- 20–30 wooden clothespins
- An LED light source (battery-powered puck light or LED string lights)
- A heat-safe work surface
Only use LED lighting. Do not use bulbs that produce heat.
Before You Start
Set up a large, flat work surface. Plug in the glue gun and allow it to fully heat. Sort your cups so they are easy to grab quickly. Keep clothespins within reach.
This project goes smoothly when everything is staged before gluing begins.
Step 1: Build the Base Ring
This step matters more than any other. A solid base makes everything else easier.
Turn all cups upside down so the open rims face the table.
Arrange 24 cups in a circle. The rims should touch, forming a clean ring. Adjust spacing until the circle closes naturally without forcing cups together.
Once you are happy with the shape, begin gluing:
- Apply hot glue to the rim of one cup
- Press it firmly against the next cup
- Hold for a few seconds, then clip the seam with a clothespin
Continue until the entire ring is glued and clipped.
Do not rush. Let the glue cool fully before moving on. The base should sit flat and not wobble.
Step 2: Add Rows Upward
This is where the dome shape begins.
Each new row is placed slightly offset from the seams below it. Do not stack cups directly on top of seams. Offsetting creates strength and curvature.
For the second row:
- Place each cup so it touches two cups below it
- Glue the cup to the cups beneath it
- Glue it to the cups beside it in the same row
- Clip and allow the glue to set
Work one cup at a time. Do not glue an entire row loosely and then try to fix it later.
As you move upward, you will gradually reduce the number of cups in each row. This is normal and necessary for the curve to form. Small gaps are expected and will disappear once the light is on.
After each row, pause and look at the shape. If something drifts, gently adjust before the glue fully hardens.
Step 3: Install the Lighting (Do Not Skip This Timing)
Before the orb is closed, install the light.
Place your LED puck light or LED string lights inside the orb. Position the light near the center, not directly at the top opening. Center placement creates the most even glow.
If using string lights, loosely coil them inside. Do not pull tightly against the cups.
Optional step (not required):
Small holes can be melted into the bottoms of cups to thread individual lights. This looks great but adds time and complexity. The orb will still look excellent without doing this.
Once the light is in place, turn it on briefly to confirm placement, then turn it off before finishing the build.
Step 4: Close the Top
Now you will finish the dome.
Attach the final row of cups, which will feel tighter than previous rows. Work slowly. Glue and clip each cup, allowing the structure to guide the shape.
Once the opening is small, cap it with one final cup. Reinforce all seams around the top with extra glue.
Do not move the orb yet. Allow the entire structure to cool for 15–20 minutes.
After the Build: Placement and Use
Place the orb with the flat side down on a stage or table. If the orb feels too light, a small weight can be taped inside the base to prevent movement.
Turn the light on only after placement. Once lit, seams and gaps become visually unnoticeable.
The orb can be used:
- On a stage
- Against a wall
- As a focal point for a themed station
- In groups for larger spaces
Common Build Issues (Quick Guidance)
If the orb feels weak, add more glue where cups touch on the sides. Strength comes from side connections, not just rim glue.
If rows drift, stop and realign before the glue fully hardens.
If clear cups look dull, add more light or switch to tinted cups.
If the light is too harsh, lower it inside the orb or angle it away from the top.
Final Encouragement
This project looks far more complex than it is. When built row by row with patience, it is forgiving, repeatable, and highly effective. Volunteers do not need crafting experience—just clear steps and permission to go slowly.
Built correctly, this orb becomes a striking visual anchor that reinforces themes of light, discovery, and illumination.